Showing posts with label HD. Show all posts

Monday, January 14, 2008

HDMI Switch Review, the Psyclone PSC47

Now that my HD HTPC is up and running, I must face the challenge of getting it hooked up into our home theater system by tackling one of the problems of the digital revolution: no system comes with enough HDMI ports!

I’m sure it must cost more for manufacturers to add HDMI ports, and yes, I concede the point that most consumers will not use more than the one or two ports that appear on most TVs or AV units. But there are plenty of us out here that want to use more than that, right? Enter the HDMI Switch.

Two years ago when I was speccing our home theater system, I looked into HDMI switches and it was shocking. Basic 2 to 4 port switches went for anywhere between $800 and $2,000. The industry was young, and we’d already hit our budget for the theater so I decided to bide my time. I knew that with the advent of the HDMI game consoles that a more affordable switch would enter the market eventually and the switch from niche need to mass appeal product would drive down costs. Luckily that time has finally come.

Enter Psyclone and their PSC47 HDMI Selector switch at only $199 for a 4 port switch. But wait, there’s more. This switch not only handles HDMI but also digital optical audio. What’s not to love, right?


Price
I’ve seen cheaper 2 port switches, but I just can’t get interested in them. I know I have enough equipment to immediately occupy 3 of the ports and while I could make do with only 2, why not go all digital and have a port leftover. Always leave expansion room for that next piece you’ve been longing for.

Availability
I was hesitant to mail order a switch because any Google search will tell you that there’s a huge number of folks out there with switches that turned out not to work with their equipment. In particular, the PS3 is extra troublesome it seems, and of course I want my PS3 hooked up. So I wanted a switch I can try out and easily return if it’s not going to get the job done. Luckily for me, Best Buy carries the PSC47. So I could get it and try it out with some confidence.

HDMI 1.3
Lots of these compatibility issues can be resolved if you stick with HDMI 1.3 switches, because the more detailed standards help overcome many of the compatibility issues. If any of your components are 1.3 and you get a non 1.3 switch, you are probably in for some hassles. The Psyclone switch is 1.3 so that’s another box checked off on my requirements list.

Discreet Remote Codes
Another item on my requirements list is that the switch must have discreet remote codes. What does that mean? Well, some switches have plus or minus keys to rotate through ports. But when you are using a universal remote to control many pieces of equipment, you need the ability to reliably choose which port is active. So the system must be able to receive a command to “go to port 3” for example. Without discreet codes for switching to exact ports, there would be no reliable way to program one button on the remote to start the DVD player, turn off the VCR, and switch to HDMI port 3 all at once. The PSC47 has discreet codes for direct port switching, as well as plus and minus port switching, gain control and power.

I’m using a Universal Remote MX-850 and I was able to learn the codes from the PSC47 remote in under 5 minutes and get the switch integrated into my universal remote.

Putting It In Place
Hooking it up was a snap, as one might expect. Pop it onto the rack, plug it into the conditioned power supply, hook up the cables and you are pretty much done. Depending on your devices and how they were configured previously you may need to tweak a few settings. For example, my PS3 had been outputting via composite cables pending getting the HDMI switch.


Working With an AV Unit
My only troubles came with I started configuring my master AV unit, a Denon AVR-2708 for the changes. Where previously I had each of the units on different inputs and could configure each separately, now that was no longer the case. When they were separate inputs, I could designate that my DVD player is outputting 5.1 audio and the Blu-Ray player was outputting 7.1 audio. But now, they would all be coming in on the same cable and unfortunately the 2807 will not let me choose the same input port for more than one group of settings. That means that I have to choose one setting and everything from the switch will be treated the same way. I’m not wild about that but it’s not a deal breaker. While I’m sure that many AV units have this same problem, most people will likely not be using the switch in conjunction with AV units instead of feeding to the TV directly.

HDMI –VS- Optical
Due to a complexity on one system component, I really needed to use Digital Audio on that component. I didn’t “need” it on the others. Due to the nature of the settings on my master AV unit (see above) I was unable to verify this, but I got the impression that if you use Optical audio from the switch to the AV unit, you had to use it for all of the components. That wasn’t a problem for me, as I was planning to pick up a few more optical cables and go all optical digital audio anyway.

The PS3
The piece I was most fearful of hitting compatibility issues with was the PS3. After a quick reconfig on the PS3 to the new cabling arrangement, everything worked great!

HDMI Switching and HDCP Tokens
It’s important to keep in mind that a HDMI switch does not work like the traditional component AV switches used in theater equipment or game switches. In component switches, the single is simply redirected to a new path and the signal is completed. HDMI equipment has more complexity. Each device in the HDMI chain from start to finish (the DVD, the switch, the master AV unit and the projector or TV) has a chip. When you power on the DVD, it is going to locate the chip on the next piece in the chain (the switch in our case) and complete a handshake. Think of it like a dial up modem looking for a receiver. If that handshake gets dropped, the signal is interrupted. Resetting that signal usually is done by powering off the device and then powering it back on to reinitialize the handshake. A HDMI switch must maintain live handshakes to each shared input component plugged into it and then renegotiate a handshake to the unit it is outputting to when you change ports on the switch.

What does all of this mean to you? If you wind up getting stuttering in the picture or audio, or if you lose the signal entirely, you probably need to reset the handshakes. In most cases this can be done by powering off the device having troubles so that when it powers on, it can create a new handshake to the switch. I suspect that many problems that people encounter with HDMI switches are actually handshake issues that are misunderstood.


Costs and Cables
The switch cost $199 and comes with one HDMI cable. This is reasonable as the manufactuer can assume that if you have a DVD, PS3 and DVR already using HDMI, you probably have cables already. I much prefer a $199 switch with one cable over a $299 switch that has 4 cables of which I need only one. The other cost factor for me was in switching to all optical digital audio. Tally up the cost of a set of HDMI cables, even the cheap ones, and the 5 digital optical cables, and the cabling cost alone can rival the cost of the switch itself. Switches are now affordable, but cabling costs still needs to come down in general, in my opinion.

Final Thoughts
The Psyclone PSC47 is getting the job done. It met all of my requirements, even though I was more demanding that it’s intended audience of gamers. It is switching my PS3, DVD, Direct TV DVR and HD Home Theater PC all flawlessly. The digital optical sound is coming through clearly and the system integrated into my universal remote with only 5 minutes of effort. Give the opportunity to start over, I’d buy the same switch again.

If you have any questions about the switch or have any comments or info to share, please leave a comment below.

Tuesday, January 8, 2008

Abit AN-M2HD Motherboard Review

There’s a lot of websites out there that review motherboardsand that will have a ton of technical information and statistics and benchmarking in their reviews. What I always wanted to see were reviews about how easily the motherboard integrated into a system, challenged faced and how well it does overall.

I recently decided to build my own HTPC supporting HD. The foundation of this system was to be the Abit AN-M2HD motherboard. This attracted me primarily because it has native HDMI support on the motherboard and HDCP support. To me, this means I could build my HTPC without needing an expensive add-on video card with HDMI support. I’ve been turned off by add-on video cards supporting HDMI previously when they came out with HD support but the cards rarely actually worked as advertised.

The AN-M2HD seems marketed at a slightly different audience then other motherboards. Instead of coming in a plain brown box or a box covered with hi-tech designs, instead it gets a retro treatment seemingly intended to attract people interested more in the results less than the motherboard specs.


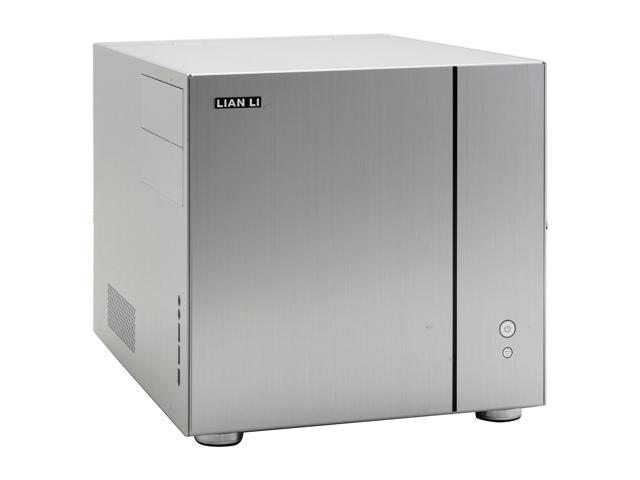
I’m mounting all of this in a Lian Li PC-V350A case which was well suited to my needs. The case is a MicroATX form factor like the AN-M2HD itself. I've got a review of the PCv350 case if you want more information.

The complete hardware list:

Abit AN-M2HD Motherboard
AMD Athlon 64 6400+ Windsor 3.2GHz Dual-Core CPU
Lian Li PC-V350A case
GSkill 2 X 1GB DDR2 800 SDRAM (PC2 6400)
Samsung 500GB drive
Thermaltake 500wt ATX power supply
Lite-On DVD ROM

That’s it for now. I won’t be needing a video card, and for my use I don’t need a TV Tuner card. I’d planned to add on a HD-DVD player, but recent news about Warner and Paramount switching to Blu-Ray has made me pause on that purchase. I can play Blu-Ray discs through my PS3, so for the time being the HTPC will be for HD from our camera and from disc rips. (My wife and I are big movie buffs and like to keep as much of our library online as possible so we can call up any movie at any time). I'll also be moving the 50-0GB hard drive from the older HTPC to this one once it's decomissioned.

Mounting the Motherboard
The Lian Li PC-V350Acase has a slide out motherboard tray that made mounting it a simple, 5 minute procedure. The motherboard comes with a custom insert plate for the back IO panel and swapping this with the V350’s back IO panel was as simple as popping one out and sticking the other in.

Case Connectors
The MB has more connectors that I had things to connect. Simple things like the power button, reset, activity lights, and such were all easy to locate and connect. Having labeled connectors on the V350 made it even easier.

Other Internal Connectors
The MB has 4 SATA connectors and 4 case USB connectors. I used only 1 SATA connector and 1 USB connector, both of which worked correctly without any BIOS tweaking or adjustments. I did not test the 1394 firewire connector, but I’ll assume it worked as well. These are all in addition to the connectors on the back IO panel.

CPU
The AN-M2HD is an AMD AM2 socket motherboard. Mounting the CPU was easy and standard. The pleasant surprise part was that it correctly set the defaults for the Athlon 64 6400+ Windsor CPU I had chosen. I’d been unable to find any posts anywhere previously that used this new processor with this motherboard.

Manual Errata
Only one SNAFU arose, when I’d connected the power supply, CPU and case connectors and tried to get an initial boot. Nothing. Just a power light on the MB, no activity at all. As it turns out, the jumper for motherboard BIOS resetting is incorrectly stated in the manual. It’s a three pin jumper and connecting either 1 and 2 or 2 and 3 has the effect of resetting the MB BIOS or performing in normal mode. Luckily the MB came with a large sticker for installation on the inside panel of the case showing all jumper positions. This sticker had the jumpers stated correctly. Swapping this jumper results in a good startup.

Memory Voltage
The Mb defaults to 1.85 for the memory voltage. I’d placed in my 2 sticks of Gskill memory and could not get a post screen. I pulled one stick out and got the post screen. Upping the memory voltage in BIO to 1.9 and placing in both sticks worked to fix the problem.

Drive Detection
I’d connected a very basic Lite-On DVD Rom drive and the Samsung 500GB hard drive. The motherboard correctly detected and identified both, which worked without incident.

Boot Sequence
The BIOS boot sequence defaults to Floppy, hard drive then CD, which to me seems backwards. If I insert a bootable CD, I expect it to boot to that CD when I power on. This was a simple thing to switch.

BIOS Updates
I downloaded the latest BIOS from Abit’s website. I was not encountering any troubles, but I wanted the latest to work with because any troubleshooting at later stages would always start with “Well, do you have the latest of everything?”. The website lists both a BIOS update and a Flash utility. The instructions on the Flash utility seem out of date. As it turns out I only needed the BIOS update which comes with the files necessary to perform the flash update as well. Overall, it was a confusing thing looking at the instructions online and trying to justify them against the files I had in hand from the download. I’m sure it’s just a case of them having generic instructions for many different motherboards, but when the instructions say things like ‘if your download has 4 files, do this, if it has 6 files do this instead’ but having a download that meets neither parameter, it’s just a hassle to figure out what to do.

Installing Windows + Drivers
Installing MS Windows MCE was a snap. No troubles at all. I installed the drivers disc that came with the MB and at the end, every device was properly detected and identified in the Hardware Manager in Windows. What a relief. I’d expected this to be a more troublesome adventure.

Based on some posts I’d read, I downloaded updated versions of the Realtek audio drivers from the Abit website. These went on without a hitch. I must say that I like the drivers and the way that they clearly identify the back panel of the MB and what connects where.

HDMI Video
Configuring the HDMI output was fairly easy. The first lesson learned is that you want your HDMI cable connected to your HDMI monitor before booting. Otherwise, Windows and your drivers cannot detect that another monitor could be used. With that covered, running the Nvidia display wizard was next.

When run, the display wizard first asked me what resolution to support on the HDMI connector. This was again a pleasant surprise. No hassles with identifying that it was a special display, or setting that it was for a TV or the rest of the normal steps. It just went right into the HDMI configuration. I chose my HDMI resolution and then it showed me my normal computer display and I picked a resolution for that one as well.

Previously I’ve been using an HTPC with Svideo out and it was much more of a hassle to setup. I’d finally settled on running it as an extended desktop setup with the computer display as the primary. This let me run the Media Center on the second monitor (The TV) and maximized and I could set the resolution for that display separately. Trying to get them both synched to the same display resolution was annoying since it meant my normal display was running at TV resolutions and was nearly unintelligible.

With the AN-M2HD, I can connect both my normal monitor and my HDMI device and set the resolution on my HDMI device and set the system to mirror both displays. The resolution is plenty high enough to be readable. The display on the computer monitor is slight stretched vertically, since it’s displaying a 16:9 image on a 4:3 monitor but that’s ok, it’s still clear.

The reason I wanted this setup is that my HDMI display, a Sony Projector, is actually 2 rooms away in the Theater Room. So any efforts at adjusting settings or handling problems were always troublesome. Change a setting, walk over two rooms, see if it helped. Walk back. Repeat. No thanks. Now I can see the display on my normal monitor and work on the system without these additional hassles.

HDMI Audio
[update: using the newer HDMI drivers from ABIT's website for this board completely corrected this issue]
OK, now for the not-so-great part. Getting audio to work over the HDMI connector is troublesome. In fact, after 4 hours of efforts, and many consultations with the Abit forums, I still have not gotten it to work. Judging by the posts, the problem effects many users.

In the end, I conceded defeat and instead connected audio using the S/PDIF link using a TOSLink cable. It’s not that the S/PDIF connection is bad, it’s that I just wanted the HDMI audio to work the way it should.

Rear Cable Connectors
One unfortunate problem is that the rear IO panel places the HDMI connector and the S/PDIF connector immediately beside each other. I've yet to ever meet an HDMI connector without a decent "hood" over the connector and TOSlink cable that did not have a full circle hooded sleeve. This means that getting both to go in at once will require a carpentry knife or other cutting utensil and a willingness to replace a cable if you cut too deep. After whittling down some on each cable hood, I was able to get them both plugged in at the same time.

Manual Omissions
I’d have felt better I the manual had a section for “how to get your HDMI output working”. It took some trial and error to get it figured out and it wasn’t that hard. However, for a board aimed at people wanting video, the manual should include a quick primer on getting that all important HDMI port working.

Conclusions
I’m pleased with the results. The board’s native HDMI and VGA connectors let me avoid buying a new PCIE video card with an HDMI connector. It works with the new 6400+ CPU and has all of the benefits and ease you’d expect from an Abit board.

The manual could be enhanced with extra information for the getting the HDMI up and running and I think this is critical for the intended audience. Apparently unfixable problems with getting audio over HDMI is unforgivable in a board whose entire existence is to support HDMI, but at least the S/PDIF link using a TOSlink cable works. If I had it all to do over again, I'd still buy the same board.

Wednesday, December 26, 2007

HD HTPC Partslist

So I settled on the parts list for the new HD HTPC. For the moment it will exist without an actual HD or Blu-Ray drive in it, as I have a Blu-Ray drive in my PS3 and feel no burning desire to spend money on a second one just for the sake of having it. I've been buying Blu-Ray discs so I have no HD discs, so paying a premium for an HD disc drive isn't a high priority either. nevertheless, the unit will be arriving in a few days and we can start assembling it.

Note: these links are to the Newegg site where I purchased them from. One can argue the point that a few bucks could be saved by buying pieces from various shops, but I have a good history with Newegg and that counts for something.


I looked at a wide range of cases in the form and style of AV equipment. If our equipment were in the theater room, I'd have placed a premium on it's visual fit into the room. But in fact the equipment racks for the theater is actually 2 rooms away in a utility room, so appearance was less critical to me than being able to easily work with the components. Given the relative difficulty of adding extra cards to theater form factor cases, I chose the mini-tower. It will sit on the rack beside our Network Attached Storage device, a 2 TerraByte Buffalo TerraStation Pro 2.

My wife's work is all digital and we need a rock solid backup of everything, so the 2 TB raid 5 array made a lot of sense for us for several reasons. The net yield is approximately 1.4TB after the RAID 5 overhead.

The partslist above isn't bleeding edge in any way. None of the parts (outside of the motherboard) are really hot stuff or super powerful. But for the task desired, they can do the job (or so we hope). We have a variety of extra(meaning old) hard drives lying around, but I kind of hate to build a brand new system on 2 year old hard drives. Instead I just merge the stack of older drives into arrays in one case and add them as more network storage to hold movies for the theater. In a few days we'll know if the idea of a under $600 HD HTPC actually works.

Sunday, December 23, 2007

HTPC for High Def

For the past 2 years, I've run an old HP desktop of ours as a Home Theater PC (HTPC). It's been great and we love having it. But over time, I've often wished that it was a bit better than the old system that it is. Specifically I wish it had better sound for our theater room and supported HD.

When we moved to Georgia 2 years ago, we set aside one room in the house, a 14 by 17 foot room as a home theater room. Our one lavish overindulgence in the new house was to build out this room with a 120 inch HD projection system and surround sound. It's bee a real pleasure to have and since we built it, we've gone out to the movies twice and have been disappointed both times. Largely due to the poor sound at theaters where volume is used to cover up poor quality.

Recently I was poking around the NVIDIA website looking at some drivers and I stumbled across information abut NVIDIA motherboard HDMI support. Ok, so um... wow.

Why is this a wow? Well, HTPC support for High Def formats is severely lacking. You need the right chipset on the motherboard, the right drivers, the right CPU to crank out all of that decoding to process the HD signal, and a video card that can push HDMI. All together it is very, VERY costly to build a HD capable HTPC that can do it right. What's new and different about these motherboards is that they take the vast bulk of the expense out of the equation.

I found the ABIT AN-M2HD version of the motherboard on Newegg for $90. This motherbaord can output HDMI natively, without the need to buy a $300+ video card to push the HD signal with. Now that's deal. I added in a case, 2 GB of memory, an AMD X2 6400 processor, a 500GB drive, DVD burner, Power Supply and some needed cables fr under $600 total order. With luck, it'll assemble in just a few hours of effort and testing and will come in far, far less than the $1,400 it would cost to build an HD HTPC using a conventional motherboard price as of last time I checked parts)

The other great thing about these motherboards is that they have an integrated on-chip HDCP key (High Definition Content Protection) so that when I toss in a blu-ray and HD drives, the signal can be properly processed by the new system and displayed in full High Def glory on our screen. For those wondering what this means, new HD standards include copy protection built into every components that can play HD signals, from the Blu-Ray player to the TV and even the cables between them. Using the wrong parts anywhere along the way in the chain can prevent your system from being able to properly play copy protected content. While your home movies won't have copy protection, your Bu-Ray or HD discs will, as may any of the potential movie download services that are just starting to come into maturity.

When the hardware arrives, I'll post up the details and assembly notes.